Ableton excels at creating dynamic workflows using their instrument and effect racks that allow you to combine and save presets of chains of effects and instruments to be able to quickly swap between sounds, layer sounds, or run the same mastering chain on all of your tunes. Ableton also allows you to save your channel strips so that you can have creative routing possibilities and reuse those templates again and again. In this article we’re going to build a drum rack that routes audio to individual channels which we can then further group and easily record to audio those clips for further manipulation and mixing.
Create a new project, or if you have an existing one open you want to build this in that works too. Create a MIDI channel and add a Drum Rack. Drag a Sampler (or Simpler instance if you prefer, you can always convert to Sampler later easily by right clicking the plugin ) onto each of the pads that corridnate to how you setup your drum pads. C1 and C#1 will be for kicks. D1 and D#1 for Clap and Snares. I tend to put my hihats on G#1-B1 across with one of those being an open hi hat. Percussion will go around C2-D#2 with maybe some other accents on the 2nd row. If you play finger pads for drums you probably already have a preferred layout, so just throw empty Samplers where you want. Rename each of these Sampler’s on the pad by clicking it, pressing CMD+R and then typing in the name, and a number.

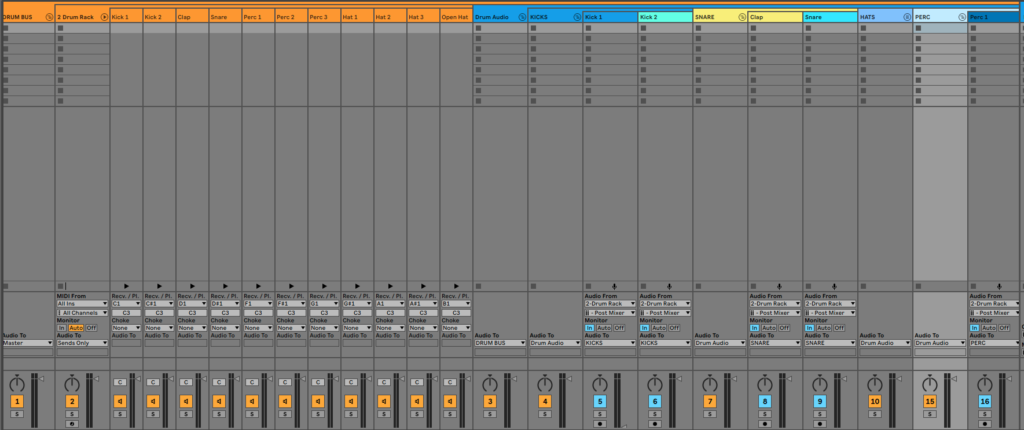
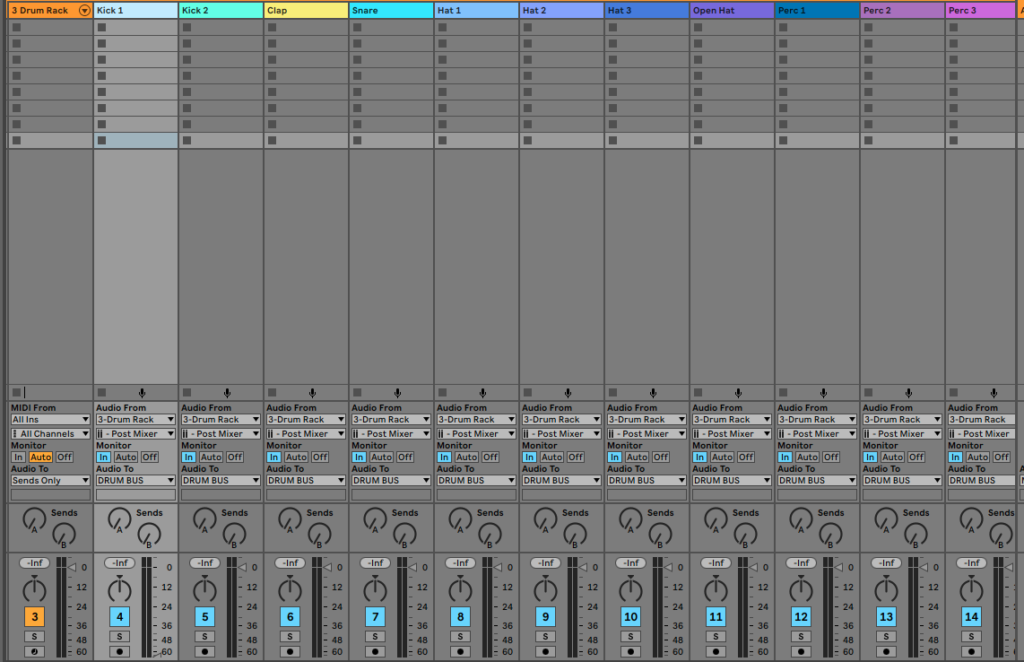
For each Sampler instance you created in the Drum Rack create a new Audio channel. Ensure you can see the IO Routing. If you can’t see it press the I-O icon on the top of the icons on the right side of the lower part of the mixer view. Rename each audio channel to the corresponding sound or sample you’re routing to it. I record each channel separately and then group the recordings as a summing voice later rather than summing them from the Drum Rack. This allows for additional processing of the audio before mixing the channels together. For each channel change the Audio From to the corresponding Drum Rack channel with the Post Mixer. You can select all the channels by clicking the first channel, holding CMD/CTRL and then clicking the last channel in the group and then hold CMD and switch the channels to In for Monitor. This will play the audio from the Drum Rack. Switch the Drum Rack Audio To setting to Sends only.
Select all of the Audio Channels and Group them together into one. I rename this channel to Drums and signify that it’s the Audio in some fashion. Once you have the Drum Rack and the Drum Audio group select those two channels and group those into a channel, name this DRUM BUS.
Click on the User Library icon on the left side menu and drag the DRUM BUS channel into the Clips folder. This will create an ALS file that contains this entire channel setup for future projects.

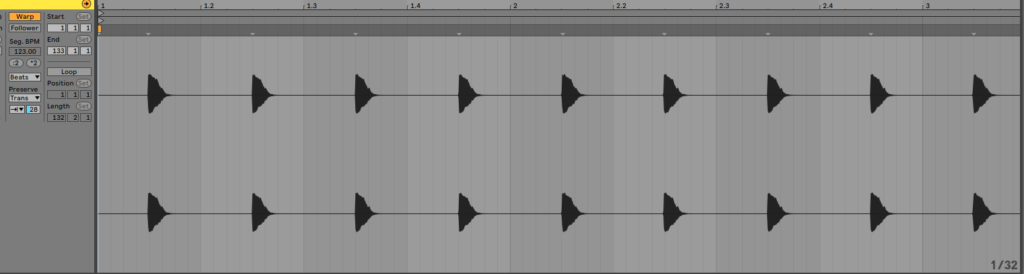
To use this rack, drag individual samples onto each Sampler in the Drum Rack and create your MIDI patterns for the Drum Rack. When you play it back, the Audio should route to each individual channel and then be played. The benefit of this allows you to process the individual drum samples, record the patterns of your samples and then further process those samples. A fun trick I do to tighten up samples after recording is to adjust the transient amount on the loop sample in the Ableton warp settings. This allows you to tighten up tails on drum hits and make things glue together.
I hope you’ve enjoyed this quick tip for Ableton and see the benefits of building a reusable drum rack to help speed up your workflow and creativity. You can expand upon this further and pre-load samples into individual notes and create crazy macros to just twist knobs and find drums, however I find this counter intuitive to my personal workflow as I like auditioning samples in the window and going from there, but for others it works great.