Using Return tracks can be a great way to add cohesion and help glue sounds together in the mix. Instead of having individual reverbs and saturators on channels, using one instance to process all of your tracks can also help save on CPU utilization. What happens though if you want to use sends and returns on an instance of Ableton’s default instrument, Drum Rack?
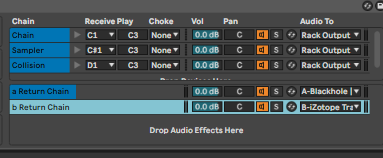
Ableton’s Drum Rack instrument has it’s own set of Sends and Returns built into the device. By utilizing empty chains, we can route the audio sent to these return channels by individual pads of the Drum Rack to the main return channel. Instead of sending the entire drum rack’s audio signal with the main send volume amounts, you can choose specific sounds within the drum rack to process with the main return.

Ensure that the Drum Rack’s IO and Return’s are viewable by toggling them on the bottom left side of the instrument panel. Right click and create a new chain in the bottom section.

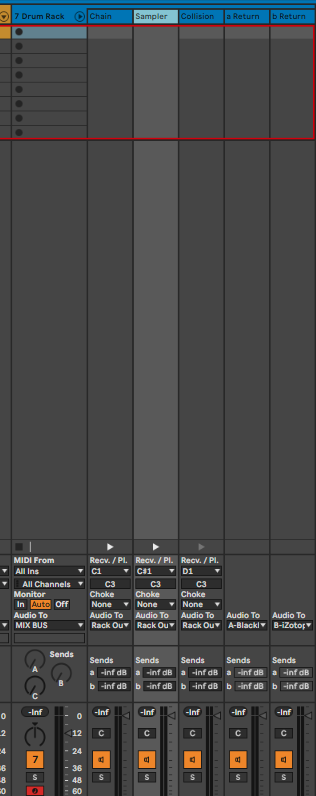
Once the Return Chain has been created, on the “Audio To” section select the main Return track to route the audio to. To be able to actually send the audio to these Sends, we have to enable the Send volume sliders in the Drum Rack. Click the grey “s” if it’s not yellow to enable the Sends for your Drum Rack pads, which will show up next to the main Volume control.
Once you have these setup within Drum Rack and the audio routed out, Ableton’s Session view allows you control the send volume amounts within each grouping of your Drum Rack’s individual pads.

Using this methodology and technique can help achieve cleaner mixdowns without having to separate out your drums individually from the main instrument and midi. Some people like to bounce drums down to audio and keep them separate, but if you’re into using Drum Rack this will definitely help.
